RedHat Linux 8.0 on the HP Omnibook
XE4500
History
Copyright
Other links of great interest
Introduction
Snapshot
BIOS
Linux
Multiboot
Why RedHat
Installing the
RedHat 8.0 Linux distribution
First boot
Kernel
Power button
XFree86
Graphics
DRI
Keyboard
Standard
keys
LCD brightness control keys
VGA/LCD video out control key
Numeric keypad control key
Suspend to disk (hibernation)
control key
Screenlock
control key
One Touch keys and
volume control keys
Touchpad
Mouse
Screensaver
Screenlock
Wired ethernet network
Wireless ethernet network
HSF modem
IDE
Sound
USB
IEEE 1394
Y/C
IrDA
GNU Free Documentation License
History
1.0 - 07/04/03:
- First version.
1.1 - 18/07/03:
- Updated BIOS version,
- Extended the XFree86/Graphics section with
informations on the required display modes for proper XWindow operation
on the 14 and 15 inches models.
1.1.1 - 21/07/03:
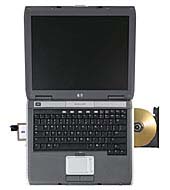
- Added the snapshot section
showing a nice picture of a 14 inches model running Linux.
Copyright
Copyright (c) 2003 - Université
de Technologie de Compiègne - Service Informatique - Marc
Villegas - marc dot villegas at utc dot fr
Permission is
granted to copy, distribute and/or modify this document under the terms
of the GNU Free Documentation License, version 1.2 or any later version
published by the Free Software Foundation; with no invariant sections,
no front-cover texts, and no back-cover texts. A copy of the license is
included in the 'GNU Free Documentation License' section of this document.
Other links of great
interest
Please, consider reading the following documents too:
Redhat Linux 7.3
on HP Omnibook XE4500 laptops
Debian
GNU/Linux 3.0 (woody) on HP OmniBook XE4500 laptops
Red Hat
Linux 7.3 on HP omnibook xe4500
Linux
on Laptops
TuxMobil - Linux compatibility guides for laptops, notebooks, PDAs, mobile phones
and GPS devices
Introduction
Please, don't blame me for my bad english. This is
not my native language ;-))
The HP Omnibook
XE4500 is a professional laptop built with no compromise . It can
be ordered with a 14 or 15 inches LCD screen. No matter the size of the
screen, the dimensions are the same for both models.
It comes with a floppy drive (HD 1.44 Mo MS-DOS
formated floppies), a minijack connector for audio output (headphones or
amplificated speakers), a minijack connector for audio input
(microphone), an IEEE-1394 4 pins connector (FireWire connector without
the 2 power lines), two PCMCIA/CardBus slots, a RJ11 connector (HSF
modem i/o), a HD15F connector (VGA output), a DB9M connector (serial
i/o), a DB25F connector (parallel i/o), an ushiden connector (Y/C video
output), a RJ45 connector (ethernet 10/100 Mb/s i/o), two USB connectors
(USB 1.1 i/o), a power plug (external power source input), a PS/2
connector (keyboard or mouse i/o), a DVD/CDR/CDRW combo drive (not
slot-in), and an IrDA sensor (InfraRed serial i/o).
Note that the DVD/CDR/CDRW combo drive comes in two
flavours : TOSHIBA SD-R2312
or QSI SBW-081 depending on the
serial number of the laptop.
It can be ordered with a builtin mini-pci 802.11b wireless
card (Wi-Fi 11Mb/s). Then, a new control button becomes available at the
right of the IrDA sensor. It is a switch to activate or deactivate the
802.11b wireless card.
As several laptops produced these days, the Omnibook
keyboard comes with several special 'multimedia' keys called, in HP
terminology, 'One Touch buttons'.
In France,
the box contains a modem to telephone cable, a user manual, a WXP Pro
license, and several CDs :
- CDRW software upgrade (1 CD)
- System Recovery W2 French (2 CDs)
- System Recovery WXP Pro French (3 CDs)
The laptop comes preinstalled with WXP Pro. In addition it contains, at
the begining of the harddisk, a special FAT formated partition called 'HP diagnostics'. You can boot to
this partition and see that it launches, under a W98 light OS, a diagnostic tool. This tool is for
use in case of hardware trouble, when you have to call the guys from the
HP customer support. So, you have to preserve
it if possible.
Note: this
document is a consolidation of a one month work university project
consisting of testing, preparing, and deploying more than 70 HP Omnibook
XE4500 for students. The full package consists of a multiboot
(HP-Diags/WXP-Pro/RH80-Linux) laptop, a wireless lan and a student
hotline. The project went into production in early december 2002.
Snapshot
[NEW]
A snapshot showing the laptop driven by Linux can be seen HERE.
BIOS
[UPDATE]
The laptop was purchased with the 1.40 version of the
BIOS. Now it runs with the latest available version: 1.93. This version (in
conjunction with a WXP ATI M6 driver upgrade) seems to solve the
infamous and random ATI video driver crash
of WXP. Nothing more to say about it. You must prepare a MS-DOS 1.44 Mo
formated floppy and decompress, under Windows, the BIOS archive. Then,
you boot on the floppy and the BIOS upgrades.
(click HERE
to obtain the latest HP Omnibook XE4500 software upgrades)
Linux
How to make a multiboot system?
First, you have to
decide what you want. Because I don't know what you want, I take an
example and develop it from scratch.
You should adapt this example to match your needs.
After reading the whole section, you will have all the material to do it
yourself.
What I want:
- a factory preserved HP-Diagnostics
partition
- a shrinked but factory preserved Windows-XP-Pro
partition
- a complete RedHat-Linux
system with a 'root',
a 'swap'
and a 'usr'
partition
- a 'shared' FAT partition for file sharing between WXP Pro and
Linux.
Starting from
scratch, I consider that you
received your laptop these days.
If you worked with it, one hour, one week, one month
or more, BACKUP ALL YOUR WINDOWS XP
DATA on a removable or external media and REINSTALL YOUR LAPTOP with the HP recovery
CD set. If you do not
make a backup, all your data will be destroyed by the multiboot creation
process.
You have been
warned!
So, your laptop is factory installed.
If it is on, just power it off.
If it is off, just do nothing ;-)
Take a sheet of
paper, a pen, and try to define, using a nice drawing, the size and
location of the different partitions you need. Normally, you have a 30
Go harddrive. This is a lot of room to make a multiboot system.
Below you will find my partition drawing. Try to
adapt it to your needs following these simple rules:
- for proper operation, don't
modify the size or location of the factory installed 'HP-Diagnostics' partition: they must
remain unmodified.
- for proper operation, don't
modify the location of
the factory installed 'WXP-Pro'
partition: it must remain unmodified.
- for simplicity, don't modify
the location of the Linux root ('/')
partition.
- for proper operation, size
your Linux swap partition at
least as large as your main memory.
- for performance issues, if you use a Linux usr ('/usr') partition, and/or
a shared ('/exchange')
partition, put it/them after the 'swap' partition.
-------------------------------------------------------------------------
|
HP-Diagnostics (Hibernation Thinkpad IBM, factory installed, 23.5 Mo) |
-------------------------------------------------------------------------
| WXP-Pro
'C:\' (HPFS/NTFS, factory installed but shrinked to, 12 Go) |
-------------------------------------------------------------------------
| Linux root '/' (Linux, 1Go)
|
-------------------------------------------------------------------------
| Linux swap
(Linux swap, 512 Mo)
|
-------------------------------------------------------------------------
| Linux usr
'/usr' (Linux, 10.5 Go)
|
-------------------------------------------------------------------------
| Linux
'/exchange' and WXP Pro 'D:\' (FAT32, 4Go)
|
-------------------------------------------------------------------------
Now, you have to
shrink the
WXP-Pro partition
to 12 Go. For this purpose, you can
use the '
BootIt
Next Generation' floppy disk from
TeraByte Unlimited
('
http://www.terabyteunlimited.com/bootitng.html').
It's
free for the purpose of
resizing a NTFS
partition.
Just generate the boot floppy from the downloaded file and boot on it. Then hit the <escape>
key when prompted to install the boot manager and use the 'Utilities'
section to resize the WXP-Pro
partition.
Now, we have room to
install Linux and the shared '
/exchange'
partition.
The
new partitions
have to be
declared during the
Linux installation procedure.
Don't forget to
NOT MODIFY the '
HP-Diagnostics' or the '
WXP-Pro' partition layout. Just
add the
missing Linux and
shared partitions, then
choose the proper
partition type. And that's all.
After installing
Linux,
check your '
/etc/lilo.conf'
lilo configuration file. It must reflect your multiboot choices. If it
is incomplete, try to modify it with the following example in mind:
click
HERE to
obtain my '
/etc/lilo.conf'
file.
Also,
check
your '/etc/fstab' file. If it is incomplete, try to modify it with the
following example in mind:
click
HERE to obtain
my '
/etc/fstab'
file.
Note that, with a multiboot system, you still can restore WXP-Pro with the HP recovery CD set, without
disturbing Linux: just select the 'C:\ only' advanced recovery mode of
the HP recovery tool and don't forget
to restore the multiboot master boot record after
the end of the restoration process (use your rescue floppy for booting
Linux and execute 'lilo
-v').
Why RedHat?
When you want to
install Linux on a PC, you have a lot of distros that
can do the job. I tried the Mandrake
9.0 and the RedHat 8.0.
My goal was to make all the XE4500 hardware work as
expected. Neither the Mandrake 9.0 nor the RedHat 8.0 distros
reached this goal, but with the RedHat 8.0, I was closer to my needs.
For the curious, with the Mandrake distro, I was
unable to configure the builtin HSF
modem.
Installing
the RedHat 8.0 Linux distribution
The funny thing with the RH 8.0 installation CDs
(and with the Mandrake 9.0 installation CDs too) is that they are useless on this laptop: the
installation procedure hangs when it detects/uses the internal
harddrive. This is a problem with the ALI
IDE controler chip of the XE4500 and the RedHat 8.0 installation
procedure kernel.
Another problem you may encounter is a hang during
keyboard detection/use.
To avoid all previous problems, add the following
kernel parameters to the 'linux'
installation procedure kernel:
ide0=0x1f0,0x3f6,14 idebus=66 nousb
When prompted for lilo (all the examples below will
use lilo instead of grub) by the installation procedure, don't forget to pass these parameters (except the 'nousb'
one) to the installed kernel too, or you will have to add them by hand
the first time booting your newly linux system, and to record them in
the lilo configuration file.
Don't forget
to install the development packages
and kernel development packages.
We will need them later. Also, and sorry for KDE freaks, I use Gnome,
so some examples below are only for Gnome users.
First boot
If the system hangs
during the early boot sequence, double check the previous point
(Installing the RedHat 8.0 Linux distribution).
If, during the installation procedure, you
configured XWindow to launch
automatically at boot time, you may encounter one of the two following
bugs at the end of the boot sequence:
or
- the screen remains black,
the system seems to be freezed.
It depends of the serial
number of your laptop. I tried several 14 inches and one 15
inches XE4500, I installed more than 70 XE4500 with the same Linux image
in my university, and I obtained one of the two previous bugs on all of them.
If all works fine during the first boot, try to
reboot one or two times more, and it will appear...
But great news, a workaround exists. And it always
works, no matter the bug (flicker or black screen) . You have to press
the following key combinations, separating them by a delay of 2 seconds:
- simultaneously press, with the left hand, <ctrl><lalt>,
with the right hand, <f1>
- delay of 2 seconds
- simultaneously press, with the left hand, <lalt>,
with the right hand, <f7>
If nothing more happens, repeat this procedure, and repeat
it again, adding a delay of 2 seconds between them. As
I previously wrote, it always works...
For the curious, I tried several versions of the
BIOS, several versions of the radeon driver, several versions of the
drm-kernel radeon module (compiling kernel and module with the default
gcc or the kgcc flavour), several versions of XFree86 (including the
latest RH RawHide 4.3.0-3 rpm,
using the builtin radeon driver or the recompiled 'gatos.sf.net' one), and nothing
worked.
In fact, with the latest XFree86 4.3.0,
the problem not only remains, but when
you logout, the laptop freezes.
Latest minute : the XFree86 4.3.0
'freeze' pb. seems to disappear
(but not the flicker/black screen pb., of course!) if you don't use DRI acceleration.
Any hint apreciated.
Kernel
I recommend the
vanilla 2.4.20
linux kernel with ACPI patch. The RedHat 8.0 kernel does not recognize the battery
component of the XE4500. This is due to a very old version of ACPI in it
(in addition, the ACPI is not activated at all on standard RedHat 8.0
kernels).
Download the 2.4.20 linux
kernel too your '/usr/src/'
directory from:
Then download
the latest ACPI patch ('acpi-20021212-2.4.20.diff.gz') for this kernel to your '/usr/src/'
directory from:
Now, uncompress the kernel source tree under '/usr/src/' and patch it with
the following shell commands:
cd /usr/src/
tar xvzf
linux-2.4.20.tar.gz
cd
linux-2.4.20
gzip -dc
../acpi-20021212-2.4.20.diff.gz | patch -p1
You must now compile
and install the new kernel. This
is not a simple task for newbies.
You must first configure your kernel, then compile
the new kernel image and kernel modules and install them. In order to
use it, you must generate a new 'initrd'
image if you installed Linux with 'ext3fs'
compiled as a kernel module. This is necessary to mount the '/' root file system in the early stage
of the boot sequence, when no kernel module support is available at this
time. Finally, you must modify the 'lilo'
configuration file and update the
master boot record of your boot harddrive.
Start configuring the compilation of the new kernel
by executing the following shell commands:
cd
/usr/src/linux-2.4.20
make mrproper
make menuconfig
The kernel configuration interface will be presented to
you. If you are familiar with it, choose what you want and save the
configuration file before exiting the interface. Don't forget to select the ACPI support.
If you prefer using a pre-defined configuration
file,
click HERE
to obtain my '/usr/src/linux-2.4.20/.config'
file.
Now, execute the following shell commands:
make dep
make clean
make bzImage
make modules
Then, install the kernel modules and the new kernel:
make
modules_install
cp System.map
/boot/System.map-2.4.20
rm -f /boot/System.map
ln -s /boot/System.map-2.4.20 /boot/System.map
cp .config /boot/config-2.4.20
cp
arch/i386/boot/bzImage /boot/vmlinuz-2.4.20
If you compiled the
kernel filesystem driver of your '/' root
partition as a module, you must
create a new 'initrd' image executing the following shell
commands:
cd /boot
cp
initrd-2.4.18-14.img toto.gz
gunzip toto.gz
mkdir
/mnt/initrd
mount -o loop
toto /mnt/initrd
cp -f
/lib/modules/2.4.20/kernel/fs/ext/ext3.o /mnt/initrd/lib/
cp -f
/lib/modules/2.4.20/kernel/fs/jbd/jbd.o /mnt/initrd/lib/
umount
/mnt/initrd
rmdir
/mnt/initrd
gzip toto
mv toto.gz
initrd-2.4.20.img
Now, you must add the following lines to the '/etc/lilo.conf'
lilo configuration file in order to validate the changes:
image=/boot/vmlinuz-2.4.20
label=RH-Linux-8.0
initrd=/boot/initrd-2.4.20.img
read-only
append="ide0=0x1f0,0x3f6,14
idebus=66 hdc=ide-scsi pci=noacpi root=LABEL=/"
(click HERE to
obtain my '/etc/lilo.conf'
modified file)
If you compiled the
kernel filesystem driver of your '/' root
partition as a static part of the
kernel, just remove the 'initrd=...'
line from the '/etc/lilo.conf'
file.
Finally, record
the boot sector modifications in
the master boot record of your boot harddrive with the following
shell command:
lilo
-v
To verify that all works as expected, you must reboot your laptop and select, in the
'lilo'
boot menu, the 'RH-Linux-8.0'
entry. The linux system should come up after booting the new kernel without any trouble.
To verify
the kernel version in use, open
a shell command line interface under Gnome and type:
uname
-r
You should obtain:
2.4.20
To verify
the ACPI version, execute the
following shell command:
cat
/proc/acpi/info
You should obtain:
version: 20021212
states:
S0 S3 S4 S5
Now, start the Gnome
battery monitor applet, and check it if it works. It must work
now indicating the battery power level,
and the state of the external power source. Thanks to the
kernel ACPI patch, you can now monitor the battery state of your laptop.
Power button
The power button does
not work as expected, i.e. as a 'suspend to ram'
switch. The 2.4
Linux kernels do not support 'suspend to ram'
for ACPI laptops (IMHO). As we will see later, hibernation ('suspend to disk')
is in early beta stage too.
So, what can we do as software pressing this button?
The only thing we can do is power off the Linux system. Thanks to ACPI, the
power button is recognized and can be managed with the user-land 'acpid'daemon.
Download it
in your '/usr/src/'
directory from:
acpid-1.0.1-fr1.i386.rpm
Then install
it with the following shell commands:
cd /usr/src/
rpm -Uvh
acpid-1.0.1-fr1.i386.rpm
Next configure
it creating the following '/etc/acpi/events/powerbutton-event'
and '/etc/acpi/actions/powerbutton-action'
files:
event=button/power
action=/etc/acpi/actions/powerbutton-action
(click HERE to obtain my '/etc/acpi/events/powerbutton-event'
file)
#!/bin/sh
xmessage=/usr/X11R6/bin/xmessage
RETVAL=0
if [ -x
$xmessage ]; then
{
export
DISPLAY=:0
export
XAUTHORITY=/var/gdm/:0.Xauth
$xmessage -timeout 15 -nearmouse -buttons Cancel:0,OK:1\
-default Cancel "Power off computer?" >/dev/null 2>&1
RETVAL=$?
}
else
{
RETVAL=1
}
fi
[ $RETVAL !=
0 ] && exec /sbin/poweroff
exit $RETVAL
(click HERE to obtain my
'/etc/acpi/actions/powerbutton-action'
file)
Next, launch
the 'acpid' daemon using the following shell
command:
/etc/init.d/acpid
start
Finally, test
it by pressing the <power>
button. A 'xmessage' window should popup near the mouse cursor prompting
you to power off your laptop.
XFree86
Graphics
The default RedHat
8.0 XFree86 distribution works. Not too bad for a laptop, if we consider
that the flicker/black screen problem has always a workaround solution.
[NEW]
Note that the
14 inches model should be configured with a
1024x768
display and the
15 inches model should be configured with a
1400x1050
display.
I also modified the '
/etc/X11/XF86Config'
file in order to fix the '
AGPMode',
the '
AGPFastWrite'
parameters.
(click
HERE
to obtain my '
/etc/X11/XF86Config'
modified file)
DRI
If you activate the
DRI option during the RedHat 8.0 installation, you will notice that the
display is reactive and fast. But have you really tested DRI?
Of course, it seems to work when you launch '
glxinfo'
or '
glxgears'.
But in fact, it does not work. It crashes several 3D apps. The
DRI interface of the default RH 8.0
radeon driver is
very bogus and
unstable.
If you don't need DRI, the default RH 8.0 XFree86
installation is what you want. But, if you need it, then
upgrade!
I tried, in november 2002, several versions of
XFree86 to solve this problem and the winner was the
4.2.99.2-0.20021122.2 RedHat RawHide XFree86 distribution.
Recently, I tried the
4.3.0-3 RawHide too and it does not work
correctly. But since 2002/11/22, several RawHide versions were built,
and, perhaps one of them will work better than the november outdated one.
No matter the version you choose, the installation
procedure is the same. You should
download
the XFree86 packages to your '
/usr/src/'
directory from:
XFree86-100dpi-fonts-4.2.99.2-0.20021122.2.i386.rpm
XFree86-Mesa-libGLU-4.2.99.2-0.20021122.2.i386.rpm
XFree86-4.2.99.2-0.20021122.2.i386.rpm
XFree86-tools-4.2.99.2-0.20021122.2.i386.rpm
XFree86-75dpi-fonts-4.2.99.2-0.20021122.2.i386.rpm
XFree86-truetype-fonts-4.2.99.2-0.20021122.2.i386.rpm
XFree86-base-fonts-4.2.99.2-0.20021122.2.i386.rpm
XFree86-twm-4.2.99.2-0.20021122.2.i386.rpm
XFree86-devel-4.2.99.2-0.20021122.2.i386.rpm
XFree86-font-utils-4.2.99.2-0.20021122.2.i386.rpm
XFree86-xauth-4.2.99.2-0.20021122.2.i386.rpm
XFree86-libs-4.2.99.2-0.20021122.2.i386.rpm
XFree86-xdm-4.2.99.2-0.20021122.2.i386.rpm
XFree86-libs-data-4.2.99.2-0.20021122.2.i386.rpm
XFree86-xfs-4.2.99.2-0.20021122.2.i386.rpm
XFree86-Mesa-libGL-4.2.99.2-0.20021122.2.i386.rpm
Then, you must
download
a '
drm-kernel'
distribution
compatible with
the
new version of XFree86.
This is
very important. Without
a compatible drm kernel module, your XFree86 radeon drivers will not
activate the DRI acceleration. Download it to your '
/usr/src/'
directory from:
radeon-20021022-linux.i386.tar.gz
Now, you should
compile
and
install the '
drm-kernel'
radeon module using the shell
commands below:
cd /usr/src/
tar xvzf
radeon-20021022-linux.i386.tar.gz
cd dripkg/
./install.sh
cd ..
rm -rf dripkg
cd
/usr/X11R6/lib/modules/extensions/
rm libdri.a
mv
dri-old.libdri.a libdri.a
cd ../linux/
rm libdrm.a
mv
dri-old.libdrm.a libdrm.a
The new '
radeon.o'
kernel module is now in the kernel modules repository at:
/lib/modules/2.4.20/kernel/drivers/char/drm/
Last but not least, if you compiled your
kernel with ACPI support, I
strongly recommend you to
add the '
pci=noacpi'
kernel command line parameter to the '
/etc/lilo.conf'
configuration file:
append="ide0=0x1f0,0x3f6,14
idebus=66 hdc=ide-scsi pci=noacpi root=LABEL=/"
(click
HERE to
obtain my '
/etc/lilo.conf'
modified file)
Then,
validate
the changes with:
lilo
-v
You can go on with the
XFree86 installation. Try the
following shell commands:
cd /usr/src
rpm -Uvh
--nodeps XFree86*.rpm
And that's all. Now,
reboot your laptop, and open a
XWindow session, then check the
DRI
acceleration availability with:
glxinfo
You should obtain:
name of display:
:0.0
disabling TCL
support
display:
:0 screen: 0
direct
rendering: Yes
server glx
vendor string: SGI
server glx
version string: 1.2
...
and with:
glxgears
You should obtain, in full screen window mode, a fps
rate greater than
45 for a 1.7
GHz XE4500 laptop.
Keyboard
Standard keys
The keyboard works well for all the
standard keys, in console or in XWindow mode, without using special
configuration hints.
LCD
brightness control keys (<fn><f1>
and <fn><f2>)
These keys work well, in console or in
XWindow mode, without using special configuration hints. It seems that
they are hardware wired to the LCD brightness controller.
VGA/LCD
video out control key (<fn><f5>)
The key does not work. The VGA output is
activated at boot time by the BIOS. You can plug a CRT and it works, but
with a low refresh rate. You cannot control the refresh rate.
Any hint apreciated.
Numeric
keypad control key (<fn><f8>)
It works on XWindow. On the console,
character sequences are generated, so, it seems to be possible to
translate them into the correct characters. I have no need for this keys
at this time, I never use these keys on laptops.
Suspend
to disk (hibernation) control key (<fn><f12>)
The
key does not work. In fact, no
keycode is generated under XWindow when you press it. In addition, '
suspend to disk'
on ACPI laptops, like the XE4500, is not supported in hardware (IMHO).
A
kernel patch and a
script shell exist for making a '
suspend to disk'
with
software, but the project
is in early beta. You can check it at:
I tried the patch and the script, I could '
suspend to disk'
(great!), but the restore procedure never reached the end. The
laptop freezed in the early
restoration process... I had no time to investigate more deeply this
issue.
Any hint apreciated.
Screenlock
control key (<fn><lock>)
The key does not work. In fact, no
keycode is generated under XWindow when you press it.
Any hint apreciated.
One Touch keys and
volume control keys
XWindow generates
keycodes for the '
mail', and
for the '
www'
One Touch keys. It generates
keycodes
too for the
<fn><page
up> volume up, for the
<fn><page
down> volume down and for the
<fn><backspace>
volume on/off keys.
The last is
bogus
(at least on my laptop). When you press the volume on/off key, XWindow
generates the keycode in an
infinite
loop that can be only aborted by pressing the volume up or down
key. Then, if you press the volume on/off key again, no keycode is
generated anymore. The key is
dead
:-((
The keycodes can be obtained using the '
/usr/X11R6/bin/xev'
XWindow tool. For your convenience, here are the keycodes for these
special keys:
- 236 : mail
- 178 : www
- 176 : volume
up
- 174 : volume
down
- 160 :
volume on/off (bogus, see above)
Of course, in order to assign actions to these keys,
you must program them. You can make it with 2 methods, but we will see
them later, because we have much more to do now :
manage all the
'One Touch' keys.
For this purpose, we will use the '
omnibook
kernel extension'. This is a driver for several hardware pieces
of the Omnibook laptops (and several Toshiba laptops too). Note that
only few parts of this kernel module
work with the XE4500. The project is
located here:
omnibook-2002-10-16.tar.gz
You must
download
the tarball in your '
/usr/src/'
directory, uncompress it,
compile
and
install it with the
following shell commands:
cd /usr/src
tar xvzf
omnibook-2002-10-16.tar.gz
cd
omnibook-2002-10-16
make
make install
cd ..
rm -rf
omnibook-2002-10-16
Then, you must
load
the
kernel module at
boot time. I use the '
/etc/rc.d/rc.local'
script file for this purpose, adding at the end of the file the
following lines:
# HP Omnibook
XE4500 multimedia keys full support
insmod
omnibook >/dev/null 2>&1
(click
HERE
to obtain my '
/etc/rc.d/rc.local'
modified file)
At startup, you will see the following messages in
the '
/var/log/messages'
file if the '
insmod'
command succeeds:
Apr 3
xx:xx:xx xxxxxxxx kernel: omnibook: module version 2002-10-16 is loaded.
Apr 3
xx:xx:xx xxxxxxxx kernel: omnibook: HP OmniBook xe4500 detected.
Apr 3
xx:xx:xx xxxxxxxx kernel: omnibook: Battery status monitoring is
unsupported on this machine.
Apr 3
xx:xx:xx xxxxxxxx kernel: omnibook: Touchpad handling is unsupported on
this machine.
Apr 3
xx:xx:xx xxxxxxxx kernel: omnibook: OneTouch buttons enabled.
Apr 3
xx:xx:xx xxxxxxxx kernel: omnibook: LCD console blanking is unsupported
on this machine.
Apr 3
xx:xx:xx xxxxxxxx kernel: omnibook: LCD brightness handling is
unsupported on this machine.
New versions of the '
omnibook
kernel extension' are available several times a month. Perhaps
they will be smarter for the XE4500 one day!
Now, if you launch '
xev' and you press the '
tv', the '
lock' or
the '
help'
One Touch key, you will get a different keycode for each:
- 243 : tv
- 241 : lock
- 240 :
help
In order to make the One Touch keys fully functional
we have to
assign actions to
these
keycodes . As I said
before, 2 methods exist and I used both for my needs.
The first one consists of assigning (
mapping) a
keysym (XWindow terminology) to a
keycode. A keysym is a symbol that
means an action like '
display the
euro character'. For that purpose, you can use the following
XWindow configuration file:
/etc/X11/Xmodmap
For example, if you want to assign the '
F1'
symbol to the '
help'
One Touch key, in order to launch the
Gnome
contextual help (or another contextual help if supported by the
running application), you have to add the following line at the end of
the
Xmodmap file:
keycode 240 = F1
(click
HERE to
obtain my '
/etc/X11/Xmodmap'
modified file)
But how to
launch
applications or
shell scripts
pressing a
One Touch key? If it
is possible to do that with the
Xmodmap
file, I don't know how.
Any hint apreciated.
Fortunately, it exists several utilities that can do
the job. And '
hotkeys'
is one of them. Installing it consists of
downloading the following RPMs in
your '
/usr/src/'
directory from:
db3-3.3.11-6.i386.rpm
xosd-0.7.0-fr3.i386.rpm
hotkeys-0.5.5-2.i386.rpm
and
installing
them with the following shell commands:
cd /usr/src
rpm -Uvh
db3-3.3.11-6.i386.rpm
rpm -Uvh
xosd-0.7.0-fr3.i386.rpm
rpm -Uvh
hotkeys-0.5.5-2.i386.rpm
Now, we have to
configure
'
hotkeys'.
If, you want to
- launch 'evolution'
when pressing the 'mail' One
Touch key,
- launch 'gmplayer'
when pressing the 'tv' One
Touch key,
- launch 'mozilla'
when pressing the 'www' One
Touch key,
- launch 'xlocknew'
(an 'xlock'
wrapper command described in the 'Screenlock'
section of this document) when pressing the 'lock' One
Touch key,
- increase the volume when pressing the 'volume up'
special key,
- decrease the volume when pressing the 'volume down'
special key,
then, you should
modify
the '
/etc/hotkeys.conf'
file like this one:
Kbd=hpomnibookxe4500
CDROM=none
WebBrowser=mozilla
Email=evolution
ScreenSaver=xlocknew
(click
HERE to
obtain my '
/etc/hotkeys.conf'
modified file)
and you should
create
a '
/usr/share/hotkeys/hpomnibookxe4500.def'
file like this one:
<?xml
version="1.0"?>
<CONFIG model="HP Omnibook XE4500 Keyboard">
<Email keycode="236"/>
<userdef keycode="243"
command="gmplayer">MPlayer</userdef>
<WebBrowser keycode="178"/>
<ScreenSaver keycode="241"/>
<!-- Managed by XWindow
<Help
keycode="240"/>
-->
<!-- Desactivated due to a bug in XWindow
<Mute
keycode="160"/>
-->
<VolDown keycode="174" adj="2"/>
<VolUp keycode="176"
adj="2"/>
</CONFIG>
(click
HERE to obtain
my '
/usr/share/hotkeys/hpomnibookxe4500.def'
XE4500 keyboard definition file for '
hotkeys')
And now, in order to
automatically launch the '
hotkeys'
daemon when you login into the XWindow session manager,
create a '
/etc/X11/xinit/xinitrc.d/hotkeys'
shell script file like this one:
#! /bin/sh
if [ -x
/usr/bin/hotkeys ] ; then
/usr/bin/hotkeys -b -Z
fi
(click
HERE to obtain my '
/etc/X11/xinit/xinitrc.d/hotkeys'
shell script file)
Don't forget
to make it executable with the following shell command:
chmod 755
/etc/X11/xinit/xinitrc.d/hotkeys
In order to test the whole thing, just
reboot your computer, open a
XWindow session and
press the '
www'
One Touch key. If '
mozilla'
launches, all works as expected.
Then, you can play with the volume up/down special keys and see the
great OSD volume level on your screen.
Touchpad
It
works like a charm. Including the
above located
switch button.
But the
scroll wheel does not work from a stock RedHat
installation.
In order to
activate
it, you must
change, in the
"InputDevice" section
for
"Mouse0",
in the '
/etc/X11/XF86Config' file,
the
"Protocol"
option parameter from
"PS/2
" to
"IMPS/2".
(click
HERE
to obtain my '
/etc/X11/XF86Config'
modified file)
Then, close your XWindow session and open a new one.
The scroll wheel should now work as expected.
Mouse
An e
xternal mouse can be connected to the
PS/2 connetor. If you do so, the
touchpad will be
deactivated by hardware design.
Another thing you should understand is that you must
connect an
external mouse that
behaves exactly the
same as the
builtin
touchpad. Xwindow,
before the
4.3.0
version, cannot handle dynamically the mouse protocol. It is hardcoded
in the '
/etc/X11/XF86Config'
file.
In addition, I never succeeded in managing the
builtin IMPS/2 touchpad with an external PS/2 mouse at the same time. No
matter they where correctly declared in the '
XF86Config'
file. If you
unplug the
external mouse, the
touchpad arrow
becomes crazy.
Switching
between
console mode and
XWindow mode seems to
correct the problem. But it will
reappear the next time you plug/unplug the external PS/2 port mouse.
The only thing you can do to avoid this bug is:
- if you do not use the touchpad scroll wheel, declare the touchpad with the 'PS/2'
protocol, and declare the external
mouse with the same 'PS/2'
protocol. Then you will be able to plug/unplug
a real PS/2 protocol mouse
(without a scroll wheel).
- if you use the touchpad scroll wheel, declare the touchpad with the 'IMPS/2'
protocol, and declare the external
mouse with the same 'IMPS/2'
protocol. Then you will be able to plug/unplug
a real IMPS/2 protocol mouse (with a scroll wheel).
Screensaver
This
section is
optional if you
don't want a
screensaver when you work
as root under XWindow.
The default XWindow screensaver '
xscreensaver'
does not work when you are
super-user. This is a design
feature, not a bug (check '
http://www.jwz.org/xscreensaver/'
for more details).
If you want to make it work, at XWindow session
login you have to open your X11 display to all the localhost X11 clients
and launch the '
xscreensaver'
shell command'.
To do that,
create
the following '
~root/.gnome2/session-manual'
(note that the file begins with a blank line):
blank_line
[Default]
num_clients=3
0,RestartStyleHint=3
0,Priority=50
0,RestartCommand=/usr/X11R6/bin/xhost +localhost
1,RestartStyleHint=3
1,Priority=50
1,RestartCommand=/usr/X11R6/bin/xscreensaver -no-splash
(click
HERE
to obtain my '
~root/.gnome2/session-manual'
file)
Now, close your Xwindow session an open a new one.
The '
xscreensaver'
command must be active now. Just
configure
it with the
Gnome control panel.
Screenlock
This
section
is
optional if you
don't want a
screenlock when you work
as root under XWindow.
The default XWindow screenlock '
xscreensaver'
does not work when you are
super-user. This is a design
feature, not a bug (check '
http://www.jwz.org/xscreensaver/'
for more details).
Unfortunately, there is no workaround using the
default '
xscreensaver'
shell command.
To avoid this behaviour, you need a
new program, '
xlockmore'.
Download it
in your '
/usr/src/'
directory from:
libintl2-0.11.2-8mdk.i586.rpm
xlockmore-5.04-4mdk.i586.rpm
Then
install
them with te following shell commands:
cd /usr/src/
rpm -Uvh
libintl2-0.11.2-8mdk.i586.rpm
rpm -Uvh
xlockmore-5.04-4mdk.i586.rpm
Now, we need
a
wrapper that will launch the '
xlock'
command when logged as '
root' or
the '
xscreensaver'
command when not. So,
create
the following '
/usr/bin/xlock.wrapper'
shell script file:
#!/bin/sh
# Source
function library.
.
/etc/init.d/functions
xlock="/usr/bin/xlock"
xlockscreensaver="space"
xscreensaver="/usr/X11R6/bin/xscreensaver"
xscreensaveroptions="-no-splash"
xscreensavercommand="/usr/X11R6/bin/xscreensaver-command"
RETVAL=0
user=`id -u`
if [ $user ==
0 ]; then
{
if [
-x $xlock ]; then
{
exec $xlock -mode $xlockscreensaver >/dev/null 2>&1
}
fi
}
else
{
if [
-x $xscreensavercommand ]; then
{
pidof $xscreensaver >/dev/null 2>&1
RETVAL=$?
if [ $RETVAL != 0 ]; then
{
if [ -x $xscreensaver ]; then
{
$xscreensaver $xscreensaveroptions >/dev/null 2>&1
RETVAL=$?
}
fi
}
fi
[ $RETVAL == 0 ] && exec $xscreensavercommand -lock
>/dev/null 2>&1
}
fi
}
fi
(click
HERE
to obtain my '
/usr/bin/xlock.wrapper'
file)
Don't forget
to
make it executable with the
following shell command:
chmod 755
/usr/bin/xlock.wrapper
Now
make the
following
symbolic link:
ln -s
/usr/bin/xlock.wrapper /usr/bin/xlocknew
Finally,
test it
when logged as '
root'
pressing the '
lock'
One Touch key if you activated the '
hotkeys'
daemon or executing the '
xlocknew'
shell command.
Wired ethernet network
It works from stock RedHat 8.0 installation. Nothing
more to do. Nothing more to say.
Wireless ethernet network
The optional builtin mini-pci 8022.11b wireless card does not work. No RedHat 8.0 drivers
seems to be available for this great piece of hardware.
Fortunately, there exists a kernel module that works enough to do wireless
connections with compatible 802.11b hardware (cards and bridges). You
can download it to your '/usr/src/'
directory from:
To configure
the kernel module for compilation, follow the shell commands below:
cd /usr/src/
tar xvzf
linux-wlan-ng-0.1.16-pre7.tar.gz
cd
linux-wlan-ng-0.1.16-pre7
make config
Answer the questions like that ('<='
indicates 'user
input required'):
...
Build Prism2.x PCMCIA Card Services (_cs) driver? (y/n) [y]: <=
n<return>
Build Prism2 PLX9052 based PCI (_plx) adapter driver? (y/n) [y]: <=
n<return>
Build Prism2.5 native PCI (_pci) driver? (y/n) [y]: <= <return>
Build Prism2.5 USB (_usb) driver? (y/n) [n]: <= <return>
Linux source directory [/usr/src/linux]: <=
/usr/src/linux-2.4.20<return>
...
Alternate target install root directory on host []: <= <return>
Module install directory [/lib/modules/2.4.20]: <= <return>
...
Prefix for build host compiler? (rarely needed) []: <= <return>
Build for debugging (see doc/config.debug) (y/n) [n]: <=
<return>
...
Then, compile
and install it
make all
make install
cd ..
rm -rf
linux-wlan-ng-0.1.16-pre7
chkconfig
--add wlan
chkconfig
--level 345 wlan on
You must add
the following line to the '/etc/modules.conf'
file:
alias wlan0
prism2_pci
(click HERE to
obtain my '/etc/modules.conf'
modified file)
Test the kernel module by activating it and by listing the new ethernet hardware
interface:
/etc/init.d/wlan
start
ifconfig wlan0
Record the ethernet address and give it to your network administrator. He/She will
record it into the centralized DHCP database of your organization.
Next you have to configure
the new ethernet interface at
boot time. Of course, you must have a 802.11b
bridge installed, configured and running near
your laptop. You should obtain some authentication informations from your
network administrator too, like the SSID
of your wireless network.
Then you have to create
a RedHat network initialization shell script file called '/etc/sysconfig/network-scripts/ifcfg-wlan0'
like this one, for example:
DEVICE=wlan0
BOOTPROTO=dhcp
ONBOOT=yes
DHCP_HOSTNAME=
IPADDR=
NAME=
DOMAIN=
NETMASK=
HWADDR=
USERCTL=no
PEERDNS=no
GATEWAY=
TYPE=Wireless
ESSID=
CHANNEL=
MODE=
KEY=
RATE=
(click HERE to
obtain my '/etc/sysconfig/network-scripts/ifcfg-wlan0'
file)
Next, obtain your SSID,
for example 'my_ssid',
and put it in the '/etc/wlan.conf':
SSID_wlan0="my_ssid"
(click HERE
to obtain my '/etc/wlan/wlan.conf'
modified file)
Now, make a copy
of the '/etc/wlan/wlancfg-DEFAULT'
default configuration file and name it '/etc/wlan/wlancfg-my_ssid'.
Edit the '/etc/wlan/wlancfg-my_ssid' file and set the required parameters for accessing your specific wireless lan, like the ones
related to WEP encrypting.
You must contact
your network administrator to set them correctly!
(click HERE
to obtain my '/etc/wlan/wlancfg-my_ssid'
configuration file)
Finally, if you want, you can correct the bug in the
RedHat graphical user interface dedicated to the configuration of
network interfaces which prevents you from seeing the 'wlan0'
ethernet interface.
Just download HERE
my 'NC_functions.py'
modified file and replace the '/usr/share/redhat-config-network/netconfpkg/NC_functions.py'
original file with it.
Now, if you configured your wireless parameters
correctly, you are able to bring up
the 'wlan0'
ethernet interface, and to ping
another machine on your lan:
ifup
wlan0
ifconfig wlan0
ping ...
At least one
problem remains with this driver.
If the card is activated by Linux and you 'reboot'
your laptop later (not 'shutdown'/'poweroff'
then restart it), the machine hangs
at Linux or WXP Pro startup during the card initialization. Each time you want to reboot or to switch to WXP Pro, you have to power off/power on your laptop.
Except this 'undocumented feature', the driver acts well and, in fact, I use
it all the day without any problem.
Note: the control
button located at the right of the IrDA sensor does not work with the driver. It
simply does nothing when it is pressed.
HSF modem
Like many others, this softmodem is not supported by RedHat 8.0.
Fortunately, you can obtain a generic HSF modem driver that works with this Conexant HSF modem. Download the driver in your '/usr/src/'
directory from:
hsflinmodem-5.03.03.L3mbsibeta02110301.tar.gz
Next install
it using the following shell commands
cd /usr/src/
tar xvzf
hsflinmodem-5.03.03.L3mbsibeta02110301.tar.gz
cd
hsflinmodem-5.03.03.L3mbsibeta02110301
make install
rm -rf
hsflinmodem-5.03.03.L3mbsibeta02110301
Then configure
it launching the following utility:
hsfconfig
Answer the questions like that ('<='
indicates 'user
input required'):
...
Should we
attempt to automatically configure your hardware? [yes] <= [return]
...
Where is the
linux source build directory that matches your running kernel?
[/lib/modules/2.4.20/build]
<= [return]
...
If you need to change
the country location settings
(i.e 'FRANCE'
if you are located in Fance), execute the following command:
hsfconfig --country
Answer the questions like that ('<='
indicates 'user
input required'):
...
Please enter
your country name [USA]: <= FRANCE [return]
...
Now, configure
a PPP connection to your ISP launching the RedHat 8.0 Internet
druid tool:
internet-druid
Then, select ('<='
indicates 'user
input required'):
...
<='Modem
Connection',
<='Forward',
'Modem
device' <= '/dev/modem'
'Connection
speed'<= '115200'
' Handshake'
<= 'Hardware (RTS/CTS)'
...
The HSF kernel module is installed and running now.
During the configuration procedure, it added the following lines into
the '/etc/modules.conf'
file:
alias
/dev/ttySHSF* hsfserial
alias char-major-240 hsfserial
alias /dev/ttyCUA* hsfserial
alias char-major-241 hsfserial
alias /dev/modem hsfserial
Note: the major numbers can be different in your
installation, but the lines must appear in this file.
Finally, add
the following lines into the '/etc/modules.conf'
file:
alias ppp0
ppp_generic
alias
ppp-compress-21 bsd_comp
alias
ppp-compress-24 ppp_deflate
alias
ppp-compress-26 ppp_deflate
(click HERE to
obtain my '/etc/modules.conf'
modified file)
Now, you are ready to test the HSF modem connection
to your ISP.
Note: you won't ear
your modem dialing because this
driver does not support this feature.
IDE
It works,
but you must add, as I wrote
previously, the 'ide0'
and 'idebus' kernel command line parameters in the '/etc/lilo.conf'
lilo configuration file:
append="ide0=0x1f0,0x3f6,14 idebus=66 hdc=ide-scsi
pci=noacpi root=LABEL=/"
(click HERE to
obtain my '/etc/lilo.conf'
modified file)
You can now activate
some IDE related performance
switches, such as DMA, that are
deactivated by default under the RedHat 8.0 for compatibility issues.
You can set them for the internal harddrive and for the internal DVD combo drive (tested with
the Toshiba and the QSI drive) using two different configuration files
you must create.
The first, '/etc/sysconfig/harddiskhda',
is for the internal harddisk
and it should contain:
# These options
are used to tune the hard drives -
# read the
hdparm man page for more information
# Set this to
1 to enable DMA. This might cause some
# data
corruption on certain chipset / hard drive
#
combinations. This is used with the "-d" option
USE_DMA=1
# Multiple
sector I/O. a feature of most modern IDE hard drives,
# permitting
the transfer of multiple sectors per I/O interrupt,
# rather than
the usual one sector per interrupt. When this feature
# is enabled,
it typically reduces operating system overhead for disk
# I/O by
30-50%. On many systems, it also provides increased data
# throughput
of anywhere from 5% to 50%. Some drives, however (most
# notably the
WD Caviar series), seem to run slower with multiple mode
# enabled.
Under rare circumstances, such failures can result in
# massive
filesystem corruption. USE WITH CAUTION AND BACKUP.
# This is the
sector count for multiple sector I/O - the "-m" option
#
MULTIPLE_IO=16
# (E)IDE
32-bit I/O support (to interface card)
#
EIDE_32BIT=3
# Enable
drive read-lookahead
#
LOOKAHEAD=1
# Add extra
parameters here if wanted
# On
reasonably new hardware, you may want to try -X66, -X67 or -X68
# Other flags
you might want to experiment with are -u1, -a and -m
# See the
hdparm manpage (man hdparm) for details and more options.
#
EXTRA_PARAMS=-X68
(click HERE
to obtain my '/etc/sysconfig/harddiskhda'
file)
The second, '/etc/sysconfig/harddiskhdc',
is for the internal DVD combo
and it should contain:
# These options
are used to tune the hard drives -
# read the
hdparm man page for more information
# Set this to
1 to enable DMA. This might cause some
# data
corruption on certain chipset / hard drive
#
combinations. This is used with the "-d" option
USE_DMA=1
# Multiple
sector I/O. a feature of most modern IDE hard drives,
# permitting
the transfer of multiple sectors per I/O interrupt,
# rather than
the usual one sector per interrupt. When this feature
# is enabled,
it typically reduces operating system overhead for disk
# I/O by
30-50%. On many systems, it also provides increased data
# throughput
of anywhere from 5% to 50%. Some drives, however (most
# notably the
WD Caviar series), seem to run slower with multiple mode
# enabled.
Under rare circumstances, such failures can result in
# massive
filesystem corruption. USE WITH CAUTION AND BACKUP.
# This is the
sector count for multiple sector I/O - the "-m" option
#
#
MULTIPLE_IO=16
# (E)IDE
32-bit I/O support (to interface card)
#
EIDE_32BIT=3
# Enable
drive read-lookahead
#
# LOOKAHEAD=1
# Add extra
parameters here if wanted
# On
reasonably new hardware, you may want to try -X66, -X67 or -X68
# Other flags
you might want to experiment with are -u1, -a and -m
# See the
hdparm manpage (man hdparm) for details and more options.
#
EXTRA_PARAMS=-X68
(click HERE
to obtain my '/etc/sysconfig/harddiskhdc'
file)
To test the whole thing, reboot the laptop and try the
following shell commands:
hdparm
-d /dev/hda
hdparm
-d /dev/hdc
You should obtain:
/dev/hda:
using_dma = 1 (on)
and
/dev/hdc:
using_dma = 1 (on)
Note: I strongly
recommend you not to play much with the 'hdparm' parameters, because you could
corrupt your data and freeze your laptop.
NEVER use them in your '/etc/sysconfig/hardisk*' configuration files WITHOUT doing long
time testing before. You have been warned!
Of course, the previous ones are safe ;-)
Now, your harddisk works faster (at least a 2x
increase!), thanks to DMA and other E-IDE extensions activation.
Sound
It works
from stock RedHat 8.0 installation. No need to install ALSA. Of course,
you can install it, if you need it.
USB
It seems to work
but I have not fully tested it.
IEEE 1394
Same thing, seems
to work but not fully tested.
Y/C
Not tested.
IrDA
Not tested.
GNU Free Documentation
License
Version 1.2, November 2002
Copyright (C) 2000,2001,2002  Free Software Foundation, Inc.
59 Temple Place, Suite 330, Boston, MA  02111-1307  USA
Everyone is permitted to copy and distribute verbatim copies
of this license document, but changing it is not allowed.
0. PREAMBLE
The purpose of this License is to make a manual, textbook, or other
functional and useful document "free" in the sense of freedom: to assure
everyone the effective freedom to copy and redistribute it, with or
without modifying it, either commercially or noncommercially.
Secondarily, this License preserves for the author and publisher a way
to get credit for their work, while not being considered responsible for
modifications made by others.
This License is a kind of "copyleft", which means that derivative
works of the document must themselves be free in the same sense. It
complements the GNU General Public License, which is a copyleft license
designed for free software.
We have designed this License in order to use it for manuals for
free software, because free software needs free documentation: a free
program should come with manuals providing the same freedoms that the
software does. But this License is not limited to software manuals; it
can be used for any textual work, regardless of subject matter or
whether it is published as a printed book. We recommend this License
principally for works whose purpose is instruction or reference.
1. APPLICABILITY AND DEFINITIONS
This License applies to any manual or other work, in any medium,
that contains a notice placed by the copyright holder saying it can be
distributed under the terms of this License. Such a notice grants a
world-wide, royalty-free license, unlimited in duration, to use that
work under the conditions stated herein. The "Document", below, refers
to any such manual or work. Any member of the public is a licensee, and
is addressed as "you". You accept the license if you copy, modify or
distribute the work in a way requiring permission under copyright law.
A "Modified Version" of the Document means any work containing the
Document or a portion of it, either copied verbatim, or with
modifications and/or translated into another language.
A "Secondary Section" is a named appendix or a front-matter section
of the Document that deals exclusively with the relationship of the
publishers or authors of the Document to the Document's overall subject
(or to related matters) and contains nothing that could fall directly
within that overall subject. (Thus, if the Document is in part a
textbook of mathematics, a Secondary Section may not explain any
mathematics.) The relationship could be a matter of historical
connection with the subject or with related matters, or of legal,
commercial, philosophical, ethical or political position regarding them.
The "Invariant Sections" are certain Secondary Sections whose titles
are designated, as being those of Invariant Sections, in the notice that
says that the Document is released under this License. If a section
does not fit the above definition of Secondary then it is not allowed to
be designated as Invariant. The Document may contain zero Invariant
Sections. If the Document does not identify any Invariant Sections then
there are none.
The "Cover Texts" are certain short passages of text that are
listed, as Front-Cover Texts or Back-Cover Texts, in the notice that
says that the Document is released under this License. A Front-Cover
Text may be at most 5 words, and a Back-Cover Text may be at most 25
words.
A "Transparent" copy of the Document means a machine-readable copy,
represented in a format whose specification is available to the general
public, that is suitable for revising the document straightforwardly
with generic text editors or (for images composed of pixels) generic
paint programs or (for drawings) some widely available drawing editor,
and that is suitable for input to text formatters or for automatic
translation to a variety of formats suitable for input to text
formatters. A copy made in an otherwise Transparent file format whose
markup, or absence of markup, has been arranged to thwart or discourage
subsequent modification by readers is not Transparent. An image format
is not Transparent if used for any substantial amount of text. A copy
that is not "Transparent" is called "Opaque".
Examples of suitable formats for Transparent copies include plain
ASCII without markup, Texinfo input format, LaTeX input format, SGML or
XML using a publicly available DTD, and standard-conforming simple HTML,
PostScript or PDF designed for human modification. Examples of
transparent image formats include PNG, XCF and JPG. Opaque formats
include proprietary formats that can be read and edited only by
proprietary word processors, SGML or XML for which the DTD and/or
processing tools are not generally available, and the machine-generated
HTML, PostScript or PDF produced by some word processors for output
purposes only.
The "Title Page" means, for a printed book, the title page itself,
plus such following pages as are needed to hold, legibly, the material
this License requires to appear in the title page. For works in formats
which do not have any title page as such, "Title Page" means the text
near the most prominent appearance of the work's title, preceding the
beginning of the body of the text.
A section "Entitled XYZ" means a named subunit of the Document whose
title either is precisely XYZ or contains XYZ in parentheses following
text that translates XYZ in another language. (Here XYZ stands for a
specific section name mentioned below, such as "Acknowledgements",
"Dedications", "Endorsements", or "History".) To "Preserve the Title"
of such a section when you modify the Document means that it remains a
section "Entitled XYZ" according to this definition.
The Document may include Warranty Disclaimers next to the notice
which states that this License applies to the Document. These Warranty
Disclaimers are considered to be included by reference in this License,
but only as regards disclaiming warranties: any other implication that
these Warranty Disclaimers may have is void and has no effect on the
meaning of this License.
2. VERBATIM COPYING
You may copy and distribute the Document in any medium, either
commercially or noncommercially, provided that this License, the
copyright notices, and the license notice saying this License applies to
the Document are reproduced in all copies, and that you add no other
conditions whatsoever to those of this License. You may not use
technical measures to obstruct or control the reading or further copying
of the copies you make or distribute. However, you may accept
compensation in exchange for copies. If you distribute a large enough
number of copies you must also follow the conditions in section 3.
You may also lend copies, under the same conditions stated above,
and you may publicly display copies.
3. COPYING IN QUANTITY
If you publish printed copies (or copies in media that commonly have
printed covers) of the Document, numbering more than 100, and the
Document's license notice requires Cover Texts, you must enclose the
copies in covers that carry, clearly and legibly, all these Cover Texts:
Front-Cover Texts on the front cover, and Back-Cover Texts on the back
cover. Both covers must also clearly and legibly identify you as the
publisher of these copies. The front cover must present the full title
with all words of the title equally prominent and visible. You may add
other material on the covers in addition. Copying with changes limited
to the covers, as long as they preserve the title of the Document and
satisfy these conditions, can be treated as verbatim copying in other
respects.
If the required texts for either cover are too voluminous to fit
legibly, you should put the first ones listed (as many as fit
reasonably) on the actual cover, and continue the rest onto adjacent
pages.
If you publish or distribute Opaque copies of the Document numbering
more than 100, you must either include a machine-readable Transparent
copy along with each Opaque copy, or state in or with each Opaque copy a
computer-network location from which the general network-using public
has access to download using public-standard network protocols a
complete Transparent copy of the Document, free of added material. If
you use the latter option, you must take reasonably prudent steps, when
you begin distribution of Opaque copies in quantity, to ensure that this
Transparent copy will remain thus accessible at the stated location
until at least one year after the last time you distribute an Opaque
copy (directly or through your agents or retailers) of that edition to
the public.
It is requested, but not required, that you contact the authors of
the Document well before redistributing any large number of copies, to
give them a chance to provide you with an updated version of the
Document.
4. MODIFICATIONS
You may copy and distribute a Modified Version of the Document under
the conditions of sections 2 and 3 above, provided that you release the
Modified Version under precisely this License, with the Modified Version
filling the role of the Document, thus licensing distribution and
modification of the Modified Version to whoever possesses a copy of it.
In addition, you must do these things in the Modified Version:
- A. Use in the Title Page (and on the covers, if
any) a title distinct from that of the Document, and from those of
previous versions (which should, if there were any, be listed in the
History section of the Document). You may use the same title as a
previous version if the original publisher of that version gives
permission.
- B. List on the Title Page, as authors, one or
more persons or entities responsible for authorship of the
modifications in the Modified Version, together with at least five of
the principal authors of the Document (all of its principal authors,
if it has fewer than five), unless they release you from this
requirement.
- C. State on the Title page the name of the
publisher of the Modified Version, as the publisher.
- D. Preserve all the copyright notices of the
Document.
- E. Add an appropriate copyright notice for your
modifications adjacent to the other copyright notices.
- F. Include, immediately after the copyright
notices, a license notice giving the public permission to use the
Modified Version under the terms of this License, in the form shown
in the Addendum below.
- G. Preserve in that license notice the full lists
of Invariant Sections and required Cover Texts given in the
Document's license notice.
- H. Include an unaltered copy of this License.
- I. Preserve the section Entitled "History",
Preserve its Title, and add to it an item stating at least the title,
year, new authors, and publisher of the Modified Version as given on
the Title Page. If there is no section Entitled "History" in the
Document, create one stating the title, year, authors, and publisher
of the Document as given on its Title Page, then add an item
describing the Modified Version as stated in the previous sentence.
- J. Preserve the network location, if any, given
in the Document for public access to a Transparent copy of the
Document, and likewise the network locations given in the Document
for previous versions it was based on. These may be placed in the
"History" section. You may omit a network location for a work that
was published at least four years before the Document itself, or if
the original publisher of the version it refers to gives permission.
- K. For any section Entitled "Acknowledgements" or
"Dedications", Preserve the Title of the section, and preserve in the
section all the substance and tone of each of the contributor
acknowledgements and/or dedications given therein.
- L. Preserve all the Invariant Sections of the
Document, unaltered in their text and in their titles. Section numbers
or the equivalent are not considered part of the section titles.
- M. Delete any section Entitled "Endorsements".
Such a section may not be included in the Modified Version.
- N. Do not retitle any existing section to be
Entitled "Endorsements" or to conflict in title with any Invariant
Section.
- O. Preserve any Warranty Disclaimers.
If the Modified Version includes new front-matter sections or
appendices that qualify as Secondary Sections and contain no material
copied from the Document, you may at your option designate some or all
of these sections as invariant. To do this, add their titles to the
list of Invariant Sections in the Modified Version's license notice.
These titles must be distinct from any other section titles.
You may add a section Entitled "Endorsements", provided it contains
nothing but endorsements of your Modified Version by various
parties--for example, statements of peer review or that the text has
been approved by an organization as the authoritative definition of a
standard.
You may add a passage of up to five words as a Front-Cover Text, and
a passage of up to 25 words as a Back-Cover Text, to the end of the list
of Cover Texts in the Modified Version. Only one passage of Front-Cover
Text and one of Back-Cover Text may be added by (or through arrangements
made by) any one entity. If the Document already includes a cover text
for the same cover, previously added by you or by arrangement made by
the same entity you are acting on behalf of, you may not add another;
but you may replace the old one, on explicit permission from the
previous publisher that added the old one.
The author(s) and publisher(s) of the Document do not by this
License give permission to use their names for publicity for or to
assert or imply endorsement of any Modified Version.
5. COMBINING DOCUMENTS
You may combine the Document with other documents released under
this License, under the terms defined in section 4 above for modified
versions, provided that you include in the combination all of the
Invariant Sections of all of the original documents, unmodified, and
list them all as Invariant Sections of your combined work in its license
notice, and that you preserve all their Warranty Disclaimers.
The combined work need only contain one copy of this License, and
multiple identical Invariant Sections may be replaced with a single
copy. If there are multiple Invariant Sections with the same name but
different contents, make the title of each such section unique by adding
at the end of it, in parentheses, the name of the original author or
publisher of that section if known, or else a unique number. Make the
same adjustment to the section titles in the list of Invariant Sections
in the license notice of the combined work.
In the combination, you must combine any sections Entitled "History"
in the various original documents, forming one section Entitled
"History"; likewise combine any sections Entitled "Acknowledgements",
and any sections Entitled "Dedications". You must delete all sections
Entitled "Endorsements."
6. COLLECTIONS OF DOCUMENTS
You may make a collection consisting of the Document and other
documents released under this License, and replace the individual copies
of this License in the various documents with a single copy that is
included in the collection, provided that you follow the rules of this
License for verbatim copying of each of the documents in all other
respects.
You may extract a single document from such a collection, and
distribute it individually under this License, provided you insert a
copy of this License into the extracted document, and follow this
License in all other respects regarding verbatim copying of that
document.
7. AGGREGATION WITH INDEPENDENT WORKS
A compilation of the Document or its derivatives with other separate
and independent documents or works, in or on a volume of a storage or
distribution medium, is called an "aggregate" if the copyright resulting
from the compilation is not used to limit the legal rights of the
compilation's users beyond what the individual works permit. When the
Document is included in an aggregate, this License does not apply to the
other works in the aggregate which are not themselves derivative works
of the Document.
If the Cover Text requirement of section 3 is applicable to these
copies of the Document, then if the Document is less than one half of
the entire aggregate, the Document's Cover Texts may be placed on covers
that bracket the Document within the aggregate, or the electronic
equivalent of covers if the Document is in electronic form. Otherwise
they must appear on printed covers that bracket the whole aggregate.
8. TRANSLATION
Translation is considered a kind of modification, so you may
distribute translations of the Document under the terms of section 4.
Replacing Invariant Sections with translations requires special
permission from their copyright holders, but you may include
translations of some or all Invariant Sections in addition to the
original versions of these Invariant Sections. You may include a
translation of this License, and all the license notices in the
Document, and any Warranty Disclaimers, provided that you also include
the original English version of this License and the original versions
of those notices and disclaimers. In case of a disagreement between the
translation and the original version of this License or a notice or
disclaimer, the original version will prevail.
If a section in the Document is Entitled "Acknowledgements",
"Dedications", or "History", the requirement (section 4) to Preserve its
Title (section 1) will typically require changing the actual title.
9. TERMINATION
You may not copy, modify, sublicense, or distribute the Document
except as expressly provided for under this License. Any other attempt
to copy, modify, sublicense or distribute the Document is void, and will
automatically terminate your rights under this License. However,
parties who have received copies, or rights, from you under this License
will not have their licenses terminated so long as such parties remain
in full compliance.
10. FUTURE REVISIONS OF THIS LICENSE
The Free Software Foundation may publish new, revised versions of
the GNU Free Documentation License from time to time. Such new versions
will be similar in spirit to the present version, but may differ in
detail to address new problems or concerns. See
http://www.gnu.org/copyleft/.
Each version of the License is given a distinguishing version
number. If the Document specifies that a particular numbered version of
this License "or any later version" applies to it, you have the option
of following the terms and conditions either of that specified version
or of any later version that has been published (not as a draft) by the
Free Software Foundation. If the Document does not specify a version
number of this License, you may choose any version ever published (not
as a draft) by the Free Software Foundation.